How to Photograph the Moon
(From Earth!)
By Scott Umstattd
We’ve all seen it with our own eyes. But when we try to take a picture of it, it can easily come across as just a spec in a night sky. Do you want to know how to photograph the moon? Today is the day that will make your night pictures howl.
What's So Inspiring About The Moon Anyway?
As we all know, the moon stays in close proximity to the earth at all times. It never leaves our side even though there are many nights when we can’t see it. The moon is literally the stuff of legends. Early civilizations made great stories of how the moon was created and how it affects our lives.
I’m sure you’ve heard stories that the moon is made of cheese or that there is a man on the moon that is smiling at us. Anything that dominates the dark of night like the moon is surely going to grab our attention. If the early Mayans knew how to photograph the moon, they would have.
But how can you take a picture of the moon that will grab the attention of the masses? Keep reading to learn how to photograph the moon.
Are you a science teacher? You might be interested in learning how you can add photography to your science curriculum. 8 Ways to Use Photography in Your Science Curriculum.
Use A Long Zoom Lens
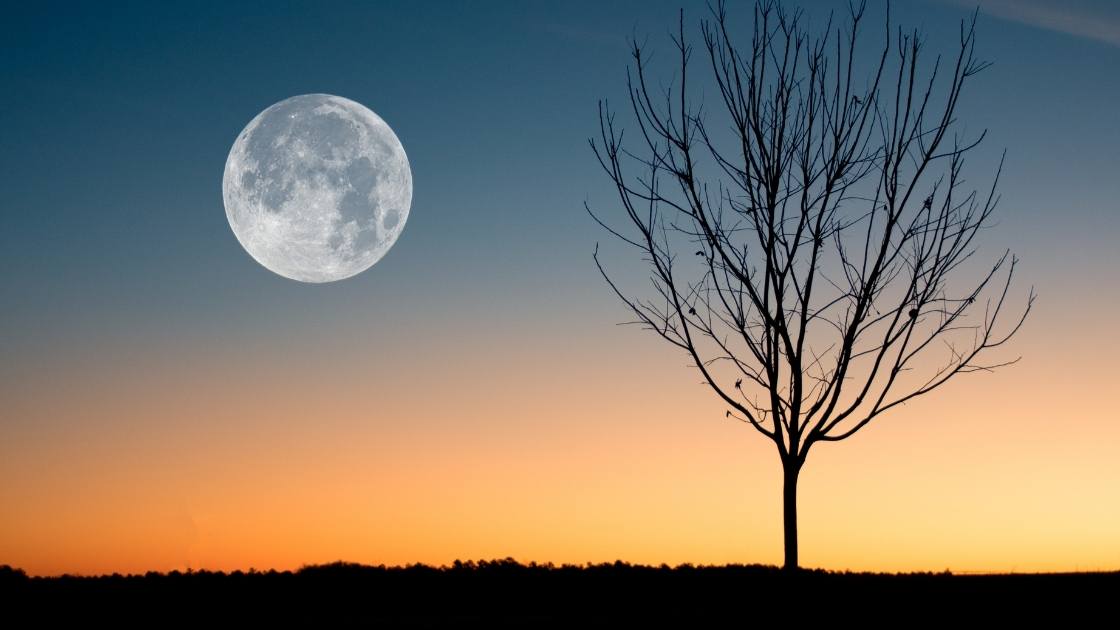
To create stunning images, as you learn how to photograph the moon, use the longest zoom lens you have. Lenses under 200mm may not bring the moon in close enough. If you use a wide angle lens, or anything under 200mm for that matter, you are all but guaranteeing that your photograph of the moon will not give the moon, or the man on it, enough credit.
Some lenses that will help to bring the moon front and center are the Canon EF 300mm f/4L IS USM or the Canon EF 400mm f/2.8L IS USM. If money and your muscles are no object, get the Canon EF 800 f/5.6L IS USM Super Telephoto to bring the moon right up to your face.
Budget and muscles are a concern of mine. I have the Canon 200mm EF f/2.8L USM lens and when coupled with a Canon 1.4X or Canon 2X teleconverter (also called extenders). I can substantially increase the zoom of my 200mm lens. Be careful however, when you use a teleconverter you will lose some sharpness and one or two exposure stops. Something to keep in mind.

Photo credit, Flickr: Capt' Gorgeous
If you have access to an observatory (or can afford Sigma's mobile observatory, the Sigma 200-500mm f/2.8 APO EX DG) that’s a great start. But odds are all you have are lenses that won't affect which college your kids go to.
Using a long zoom lens will bring the moon closer and that will allow the moon to fill up more of your frame. Zoom in and get close! But be careful! As you zoom in closer and closer your own movements become exaggerated and that will cause your pictures to be blurry. You have to use a faster shutter speed or use a tripod to get tack sharp pictures.
Be Still. Be Very Still.
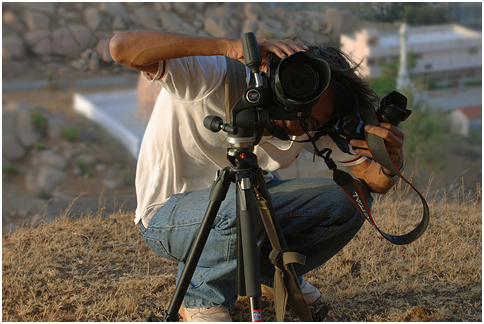
Photo credit, Flickr: Nevil Zaveri
One of the first things you will need as you learn how to photography the moon is a tripod. Since you are shooting at night (or near night) and you are zoomed way in be prepared to use a shutter speed that may go beyond your own ability to stand still. You are using a tripod to ensure that the moon stays in focus. So, take the extra step of setting the timer on your camera or using a remote trigger to release the shutter.
By using a remote trigger or camera timer you are helping to guarantee that your finger pressing on the shutter doesn’t cause the camera to move. What a waste to bring a tripod just to have your itchy trigger finger ruin the whole thing. Keep things steady by using a tripod and keep your hands off the camera when the shutter is released. This is critical to understand as you learn how to photograph the moon.
Focus And Shoot In Manual Mode
When figuring out how to photograph the moon you need to understand that you are smarter than your camera. Your camera is smart but you are smarter. If you try to shoot in auto mode or aperture or shutter priority your camera will not understand what you are trying to do and it will provide you with an exposure based on the moon and all the other stuff around it.
Your best bet is to set your exposure manually. Depending on how bright the moon is and how awesome your lens and camera are you may find that auto-focus just jumps around. Shoot in manual mode and set your exposure for what you need not what the camera thinks you need.
Use A Narrow Aperture
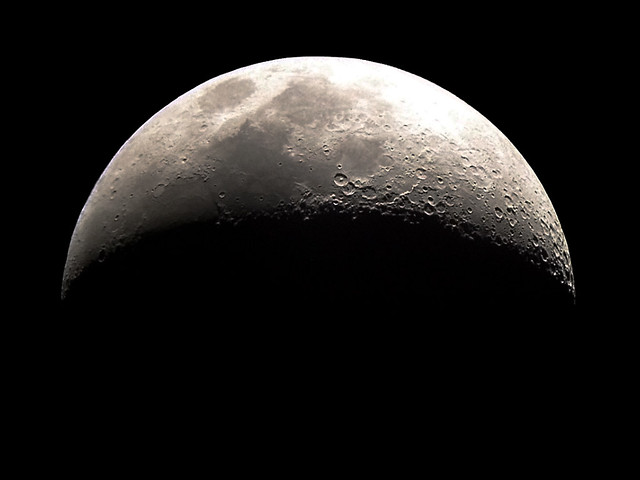
Photo credit, Flickr: Barto
This may seem counter-intuitive since you are shooting at night and want to bring in as much light as possible. But when you use a wide aperture (like f/2.8) you are not going to get the sharpness and details found on the moon’s surface. How can you tell what kind of cheese the moon is made of with a soft image?
When taking photographs of the moon shoot at a narrow aperture. Somewhere between f/11 and f/16 is a good place to start. But keep in mind that your image will likely become noisy if you shoot at a very narrow aperture. You can try shooting at f/22 or f/32 but the image will probably not come out looking as good. As with most aspects of photography practice will make perfect.
Get Out Of Town
If you are specifically going out of your way to learn how to photograph the moon then go out of your way and get away from the ambient lights that cities create from street lights, car lights, signs and what-not. The ambient light from cities will interfere with the light coming from the moon resulting in soft images. To get really tack-sharp pictures of the moon find a place where the moonlight is the dominating light.
Remember that the moon does not emit light. The way we see the moon is by sunlight reflecting off of it.
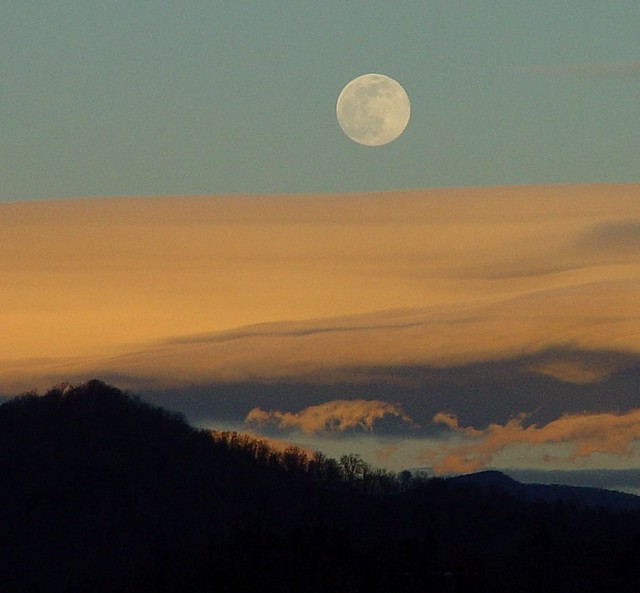
Photo credit, Flickr: zen Sutherland
Set Your ISO Low
It may be tempting to increase the ISO so that you can use a faster shutter speed, thus avoiding the need for a tripod. While this makes sense, (and it can work) keeping the digital noise created by higher ISOs to a minimum will help to make your photograph of the moon crisp and clear and more awe inspiring.
Bracket Your Picture Of The Moon

Photo credit, Flickr: runmonty
Bracket your pictures. Bracketing your pictures means that you are taking multiple pictures and different exposures. With Photoshop or Photomatix you can take combine those pictures into one super picture that will cover all of your exposure bases. The resulting image is called an HDR picture. This is a great tip to help bring out as much detail as possible.
If you are bracketing your pictures without a tripod set your camera’s drive mode to rapid fire. By taking the pictures very quickly you are helping to ensure that your movement doesn’t create any blurry after effects to your final HDR image. This rapid fire method may not be necessary if you have your camera mounted on a tripod.
The Unplanned Moon Shot
Do you want to know how to photograph the moon without any planning? What if you are driving around town and you turn the corner to see the moon just staring you in the face daring you to take a picture of it? What do you do? You weren’t planning on this to happen but the moon has dared you to take a picture of it and you are not one to back away from a challenge from any orbiting object.

Photo credit: Scott Umstattd
Since you don’t have a tripod it is now OK to up your ISO so that you can shoot the moon without worrying about your unsteady hands. In the picture above, I used a Canon 30D and a Canon 200mm f/2.8L USM lens. My ISO was set at 1600 and the f/stop was set at f/2.8. By using a higher ISO and a wide aperture I was able to get the shot without using a tripod.
Something is better than nothing and if you are shooting with a newer DSLR odds are your ISO gains will be managed well because newer cameras are always going to have better noise/gain control than older cameras. At some point none of this will matter because we will be taking pictures by winking our eyes at stuff. But that technology is years away. At least for consumers. I’m willing to bet the NSA already has retina cameras.
With No Other Options Left, Crop It
If you accepted the moon’s dare and took its picture with a wide angle lens and the resulting image left you with more black sky than you wanted, crop that sucker down to a point where the moon fills the frame. Again, newer cameras with more megapixels can be cropped a lot and still retain a sharp image. It’s not a crime to crop. Remember that.
Black and White
One last tip to as your learn how to photograph the moon.
Oftentimes you will notice that the moon casts a bit of an orange glow. Remember, the moon is only reflecting the light of the sun. If your moon's color is off or it's just not a pleasing color turn it into a black and white image. This simple post processing effort will remove the distraction and give it an unearthly feel.
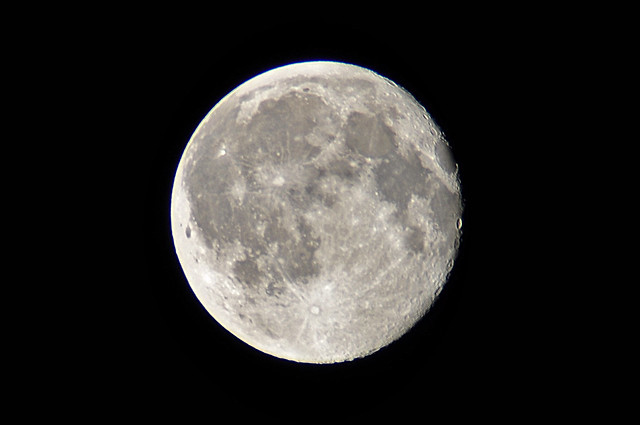
Photo credit, Flickr: dingopup
How To Photograph The Moon | Power Review
- Use a tripod - steady is better.
- Shoot in manual mode - you are smarter than your camera.
- Use a low ISO- avoid the noise.
- Use a long zoom lens - bring the moon to you.
- Avoid ambient light - city lights get in the way.
- Use a narrow aperture - you want the moon to be sharp.
- Crop your picture - cropping can be cool.
- And when you have to - make it black and white.
How To Take A Picture Of The Moon With A Telescope (VIDEO)
More from picture power


Recommended for you
Integrating Smartphone Photography Across Classroom Curriculums
Let's explore how incorporating smartphone photography can transform traditional learning environments into vibrant hubs of discovery for students.
Shadows Unveiled 5 Ways to Decode the Language of Light in Photography
In the language of photography, shadows are the eloquent narrators of light's characteristics. Let's delve into the significance of shadows in photography.
Low Light Wedding Photography Tips
Shooting a wedding involves endless variables, especially when it comes to light. How do you capture great shots without a flash? Here are some basic low light wedding photography tips.


photography lesson plans pack


Search
Picture Power