Insect Photography Tips
The Down and Dirty on How to Shoot the Itty Bitty
By Scott Umstattd
Insect Photography Tips: Are you ready to go big?
I mean really big?
Stop bugging out. You're about to learn how you can make those teeny tiny creepy crawlies look like monsters that could take down a city block.
Insect photography is a down and dirty business. Forget those boring and tired landscape and sunset pictures that everyone else is taking. We've all seen them. These insect photography tips will teach you how to make the minuscule look monstrous.
Stop stepping on bugs and insects!
Get down on their level and open your eyes to a world that is filled with the weird and the fascinating.
Ready? Let's go. Here are a handful of insect photography tips that will change the way you see the world.

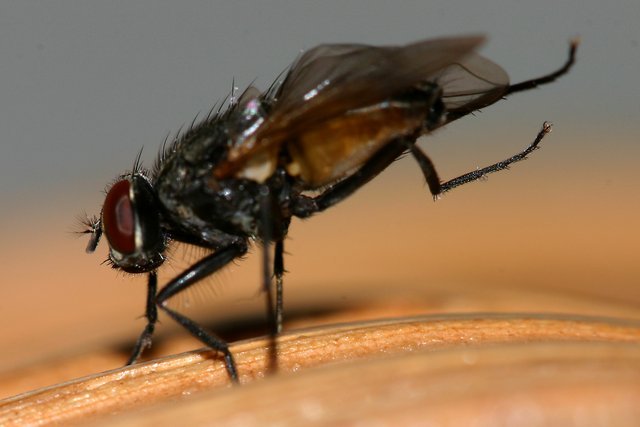
The Fly That Ate Albuquerque, coming to a theater near you.
Photo Credit: Marcin Morawiec
Are you a science teacher? You might like 8 Ways to Use Photography in Your Science Curriculum.
Use The Right Gear
To get amazing insect pictures you really do need some special equipment. That normal everyday lens that you use to take vacation pictures just won't work when your subject is this small.
You can invest in macro lenses, extension tubes and even zoom lenses to get your bugs to fill your frame. And that is what macro photography lenses and tools do.
They allow you to fill the entire picture frame with something that is extremely small. And this is what your everyday lens cannot do.
I've written a companion article that provides a list of insect photography tools and lenses you can use to make the most of the amazing little worlds that live hidden in plain sight.

Insect Photography Tips: Use the right tools. You wouldn't use a sledgehammer to hang a picture. Macro lenses and extension tubes are made to take pictures of insects and other little things.
Photo Credit: Marcin Morawiec
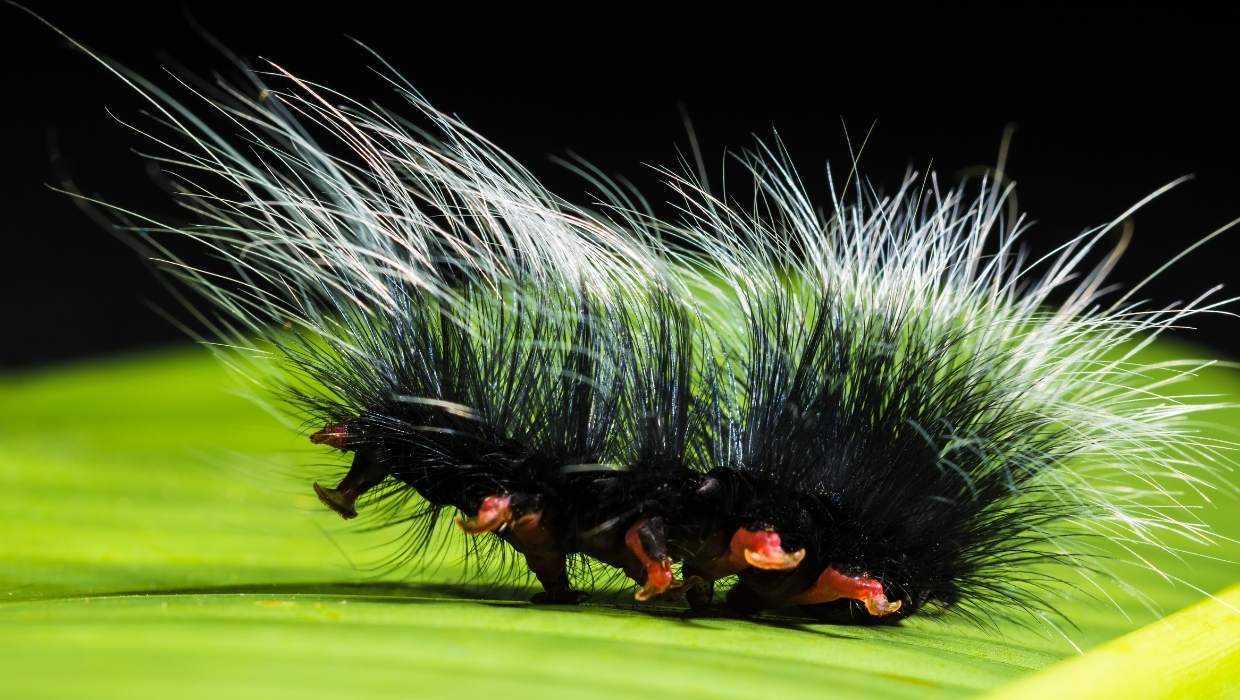
Shoot At The Insect's Eye Level
Getting down to the insect's eye level is incredibly important, especially if you are trying to make your bug look big and menacing.
If you simply stand on top of an insect you will not get that monster look that makes insect photography so cool.

Look for insects that are in trees or shrubs.
This can help you get underneath the bug and that will force your viewers to look up to something that we normally look down upon.
Get creative with your angles. Try to find a position where you are pointing the camera and lens up or at least at eye level with your subject.
Never be content standing on top of a bug and simply pointing your camera down at it.
If you're going to do that, stick with sunsets and landscapes and save us all the misery of looking at yet another boring picture of a bug's back.
Finding Focus Is Hard. Be Ready And Be Steady.
Finding that perfect focus is the most difficult part of insect photography.
Insects are not models and they don't care about how they are going to look in your pictures. They will not cooperate with you. So you have to think and act quickly.
Getting sharp pictures of insects is hard for everyone. Don't give up if you fail more often than you succeed.
Just keep on shooting.
Be patient, be steady and be ready.
If your insect is moving or flying about you may want or need to use a faster shutter speed to lock your moving monster into focus.
Know your camera's limits and avoid shooting at ISO levels that create unsightly noise in your pictures.
If you add attachments to your lens and camera you may find that auto focusing either doesn't work or doesn't work well. Obviously, a lens with excellent auto focusing would be a nice advantage.
When focusing with a macro lens you may need to move forward or backward ever so slightly to find that perfect focus. Your depth of field will be thin and that means that every little tweak of your focus ring or slight movement forward or backward will be exaggerated.
When you think of depth of field, think in terms of thick and thin. Insect photography has a thin depth of field to begin with. When you shoot with your aperture wide open the depth of field can become razor thin. This can result in a bug's eyes being in focus with the rest of the body blurred out and therefore out of focus.
For a thicker depth of field (getting more than the eyes in focus) you will need to use a narrow aperture.
Use A Narrow Aperture

Insect Photography Tips: Getting focus throughout the entire depth of field is a challenging aspect that all macro photographers must overcome. There's nothing wrong with a shallow depth of field, but your insect can be better understood if your viewers are able to see its entire body in focus.
Photo Credit: Marcin Morawiec
When you are shooting macro it is tempting to open your aperture to let more light in. While there is no right or wrong here you need to know that in order to get the entire bug in focus you want to use a narrow aperture (higher f/stop).
Go as high as you can go with your f/stop. This will narrow your aperture.
This will help to ensure that you have focus throughout your depth of field ensuring that the eyes, the midsection and the tail are all in focus if you are taking the picture head on with the insect.
When you use a narrow aperture you limit the amount of light that will come through the lens. You can get more light by using a longer shutter speed. But that can make for a blurry picture if you don't have a steady hand or if your bug bugs out while the shutter is open.
You can use a tripod to help keep things steady. But no matter how steady you and your camera are, any movement by your tiny subject can still ruin your shot if your shutter speed is too slow.
To overcome the lack of light coming through the lens when using a narrow aperture you can also increase your ISO. This will allow you to use a faster shutter speed. Know your camera's limits and avoid shooting at ISO levels that create unsightly noise in your pictures.
Your other option is simply to get more light on your insect. Read my companion article on lighting for insect photography to learn what kinds of portable flashes and reflectors you can easily take with you as you adventure through the woods.
Take Profile Shots If You Must Use A Wide Aperture
Insect Photography Tips: If you have to use a wide aperture to get your picture take a shot of your insect from the side. This will give your viewers an insect that is more in focus and it can help to eliminate the challenges that a shallow depth of field creates in macro photography.
Photo Credit: Christophe Libert
Focusing is difficult with insect photography. This isn't true just for insects it's true for all forms of macro photography. It's one of the inherent challenges you'll encounter when you are face to face with anything of a tiny nature.
If you have no other option other than using a wide aperture (low f/stop number) try moving to the side of your subject to get the head, midsection and tail in focus. If you can't move, wait for your insect to move into position instead and be ready to hit the shutter.
Keep The Background Clean and Relevant
Your background can make or break the impact of your insect photography. To make sure that your bug gets all the attention it deserves find angles that eliminate a cluttered background.
Because of the thin depth of field in macro photography odds are that your background is going to be blurred out anyway. Pay attention to the colors behind your insect. If you have a lens that produces nice bokeh, you will get the kind of pictures that really pop.

Insect Photography Tips: A clean and neat background will make your insect stand out. Move around and find the best angles that highlight your subject. You can also use its natural environment to help your viewers understand your insect's world.
Photo Credit: Scott Umstattd
Find and Use Light To Your Advantage
Light means everything in photography. Whether you are taking pictures of the moon, a bug or your brother, how your subject is lit will play a crucial role not only in how we see your pictures but how we define your pictures.
There is hard light, soft light, different colored light. All kinds of light.
When taking pictures of insects pay close attention to where your light is coming from and how it is casting shadows. Mastering low light photography is crucial for every photographer.
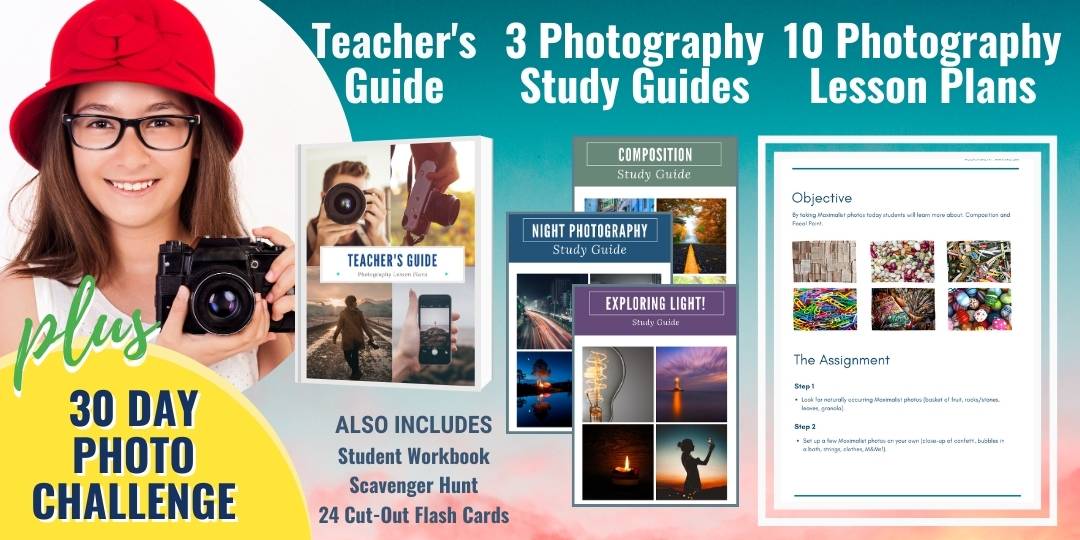
Do you want to teach photography? Picture Power's Photography Lesson Plans are being used in public and private schools, post secondary education, and homeschool environments.

Insect Photography Tips: Even lighting and a background that lets your viewer understand your subject makes this picture and the lady bug stand out.
Photo Credit: Tolgar Kelleci
The sun creates hard light during the middle of the day.
The sun creates softer light during sunrise and sunset. Hard light makes darker shadows and darker shadows can sometimes interfere with your subject by making your viewer focus on the shadows and not the subject.
Softer light creates softer shadows which helps to keep your viewer's focus on your subject. Additionally, the softer lights and softer shadows will work to your advantage when you begin editing your picture.
If your subject has too much contrast or is too sharp, that imperfection cannot be removed in editing.
Whereas softer shadows and scenes with less contrast easily accept more contrast and sharpness. If you plan on editing your insect pictures, shoot a little soft to give yourself room in post.
I mention the sun and its light because most often you will be using sunlight to light your insects. But you don't have to rely solely on the direct light from the sun.
Lighting Insects
Odds are the light coming from your camera's built in flash won't even hit your insect. Your lens will likely be so close to your subject that it blocks any light coming from above and behind.

Insect Photography Tips: A flash can make your insect stand out, especially with a clean background. But be careful with your flash, if you don't use it right it can mess up a good thing.
Photo Credit: Michael Chapman
To add more dimension to your insect photography you can bounce the sun's light with a simple sheet of white paper or a pocket-sized collapsible reflector.
By simply placing something reflective near your subject the sun's light will hit the bug twice. Once hard. And once soft. But it can be challenging to hold a reflector and your camera while taking pictures of a bug that will not be still.
Check out the insect photography gear list to learn more about bouncing light onto bugs.
There are also lights you can place around the front of your lens that are designed to cast a nice, even light around your macro photography subjects. There's a lot more to learn about light rings and other lighting options for insect photography.
Insect Photography Tips Recap

Insect Photography Tips: You can bounce light to give your insect an even exposure. In this picture, light is bouncing from underneath this insect to help shine light on its belly.
Photo Credit: Apirach Sri
Here's a quick recap of the insect photography tips covered in this article.
- Insect Photography requires special equipment.
- Focusing is difficult. Be prepared to delete a lot of your pictures.
- Shoot with a narrow aperture to get focus throughout your depth of field.
- Shoot with a fast shutter speed because bugs move a lot and they move fast.
- Find interesting angles. Don't stand over your subject and shoot down.
- Make sure your background helps and doesn't hurt. Keep it clean.
- Lighting can be challenging. Bring light or bounce light.
A Few Final Words
Insects are cool. We hardly notice them and if we do it's often because they are in our way or in our home.
Take some time to understand why these creatures do what they do and why they look the way they look. After studying them for a while try to catch them doing something that makes them unique. Or at least, interesting.
If you are a science teacher you might be interested to learn how photography can be a great tool to use in your classes. Learn how by reading 8 Ways to Use Photography in Your Science Curriculum.
Insect Photography Video
Thomas Shahan has put together an incredibly thorough video with a lot of great insect photography tips and guidance.
related articles
- Insect Photography Tips: Tripods, Monopods, Focus Rails
- Insect Photography Tips: Lighting and Accessories
- Insect Photography Tips: Lenses and Accessories
More from picture power


RECOMMENDED FOR YOU
7 Low Light Digital Photography Tips
The test of a good photographer is not how well they shoot in good light, but how they handle a low-light situation. Here are some basic tips on shooting low light digital photography.
Engagement Photo Ideas For Wedding Photographers And Couples
Whether you use props, matching outfits or a unique setting, get inspired with these engagement photo ideas.
Fun Photography Ideas | Tips for photographing toys and memorabilia
These fun photography ideas can turn a boring day into a day of adventure. Give your toys the attention they deserve and learn how to think like a cinematographer.


A COMPLETE PHOTOGRAPHY TEACHING KIT
Return Home from Insect Photography Tips


Search
Picture Power