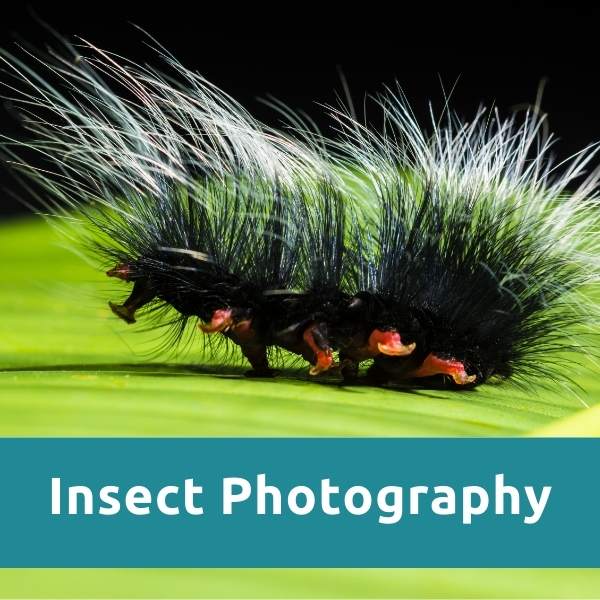
Insect Photography Tips
Lighting and Accessories
By Scott Umstattd

Photo Credit: Alexander Wild
Insect Photography Tips: This is not normal photography. Everything about insect photography requires that you and the equipment you use behave in very unique ways.
For one, you are going to need lenses made for insect photography or you will need to add some lens attachments to your existing lenses to get them to perform at this macro level.
To get truly amazing pictures of bugs and other creepy crawly things you need to light them like a supermodel. And that can require some very special insect photography lighting equipment that your built in flash is not designed for.
Insect Photography And Depth of Field
Maintaining focus throughout the entire depth of field is challenging for all macro photographers. This is something that every insect photographer must contend with. Which is why it is important that we start here.
Understanding depth of field is vital to your success in photographing insects and lighting plays a key role in getting focus throughout your depth of field.
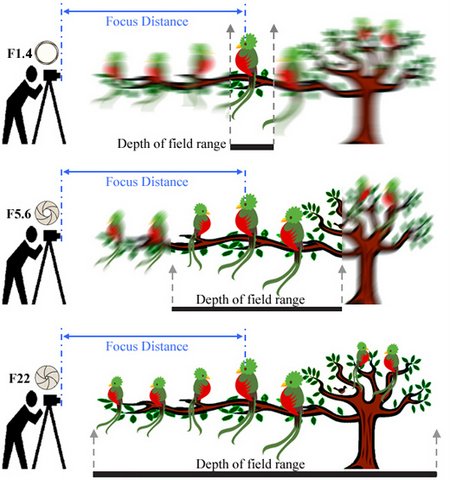
An easy way to understand depth of field is to think in terms of thick and thin. To get more focus throughout your depth of field you will have to use a narrow aperture (higher f/stop). This adds "thickness" to your focus.
But (and there always seems to be a "but" to every photography solution) when you use a narrow aperture you are limiting the amount of light that comes through the lens. This is why it is important to light your insects with as much light as possible. In order to get more of your insect in focus more light is needed to compensate for the necessary narrow aperture.
When you use a wide aperture (low f/stop number) to let in more light through your lens you get a "thinner" focus. However, this can result in the head of a bug being in focus and it's backside being blurred out if you are shooting head-on with your subject.
Depth of field can require a lengthy explanation if you are just starting out. To get a better understanding you can read another article devoted entirely to depth of field.
Natural Lighting For Insect Photography
Light can make or break any picture. Where is the light coming from? Is there one light source or two? Maybe three? Is the light casting a blue or orange tint?
What time of day you take pictures will affect your lighting (if you are shooting outside). The time of day will also determine how and where your shadows are cast.
During the middle of the day your shadows will be under your insects. In the early morning or evening hours, shadows will be cast off to the side of your subject.

Photo Credit: Alexander Wild
If you are going out with insect photography in mind, go out in the early morning hours or in the evening hours when the sun is low on the horizon. It's also during this time that the insects will be most involved in their activities.
You can also make good use of any shade being cast on your subject. If the sun is casting dark shadows that distract attention from your subject you can hold something over the insect to eliminate those harsh shadows.
And here's another "but": if your insect is in the shadows that means that less light is hitting your insect. Another way to get more light on your subject (without using extra lighting) is to use a longer shutter speed. But, a longer shutter speed may result in your pictures coming out blurry due to your own movement and/or the movement of your insect.
To overcome blurry pictures caused by your own movement you can use a tripod, monopod or several other items to stabilize your camera. If you are interested in these types of tools you can read about how to keep your camera steady when taking pictures of insects.
Why Your Built In Flash Is Not Ideal
It's tempting to just pop up your camera's internal flash to get enough light on your subject to balance the higher f/stop setting needed to maintain focus throughout your depth of field or to simply get some more light on your insect.
But this is often the last thing you want to do if you want to capture a powerful picture of an insect or bug.

Photo Credit: Alexander Wild
Built-in flashes will hit your insects with flat light straight on and that doesn't leave room for shadows to define the curves and textures of insects (or people for that matter).
Another problem using your camera's internal (built-in) flash is that the light from the flash may not hit your subject.
The built-in flash is not designed for macro photography. Light from your camera's internal flash is made to go "out and away" and not "down toward" your subject.
If you have to use your internal flash you can tape or hold a piece of paper over your internal flash (like a baseball hat). This will force the light down to the area where your insect is. But don't be surprised when that doesn't work because your lens may still be in the way.
To learn which lenses will let you photograph insects from a farther distance and allow you to use your internal flash you can read another article devoted to insect photography lenses.
Setting Exposure For Your Light
The amount of light you have available will have a direct result on your exposure settings. Finding the best exposure setting for your particular need requires a lot of trial and error.
Photography exposure is another topic that may require more explanation if you are just getting into photography.
You can read more about exposure, underexposure and overexposure if you need to.

Photo Credit: Alexander Wild
You can use your camera's many automatic exposure settings and you will probably be content most of the time. But when you are taking pictures of insects you need to know how to set the best exposure to give you what you need and not just settle on being content with the pictures your camera gave you.
What if your subject's head is in the sun and its tail is in the shade? Finding the right exposure under these conditions can be impossible.
This is when using flashes made for insect photography will earn their merit and save your day.
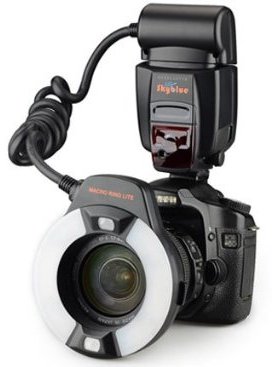
Insect Photography Light Rings and Flashes
Light rings and twin light flashes are designed specifically for macro photography.
In their own unique ways they will help you add more light directly on your subject so that you can use a narrow aperture to get more depth of field in your pictures.
They will also cast an even light helping you overcome any inconsistencies (shadows) that natural light is giving you.
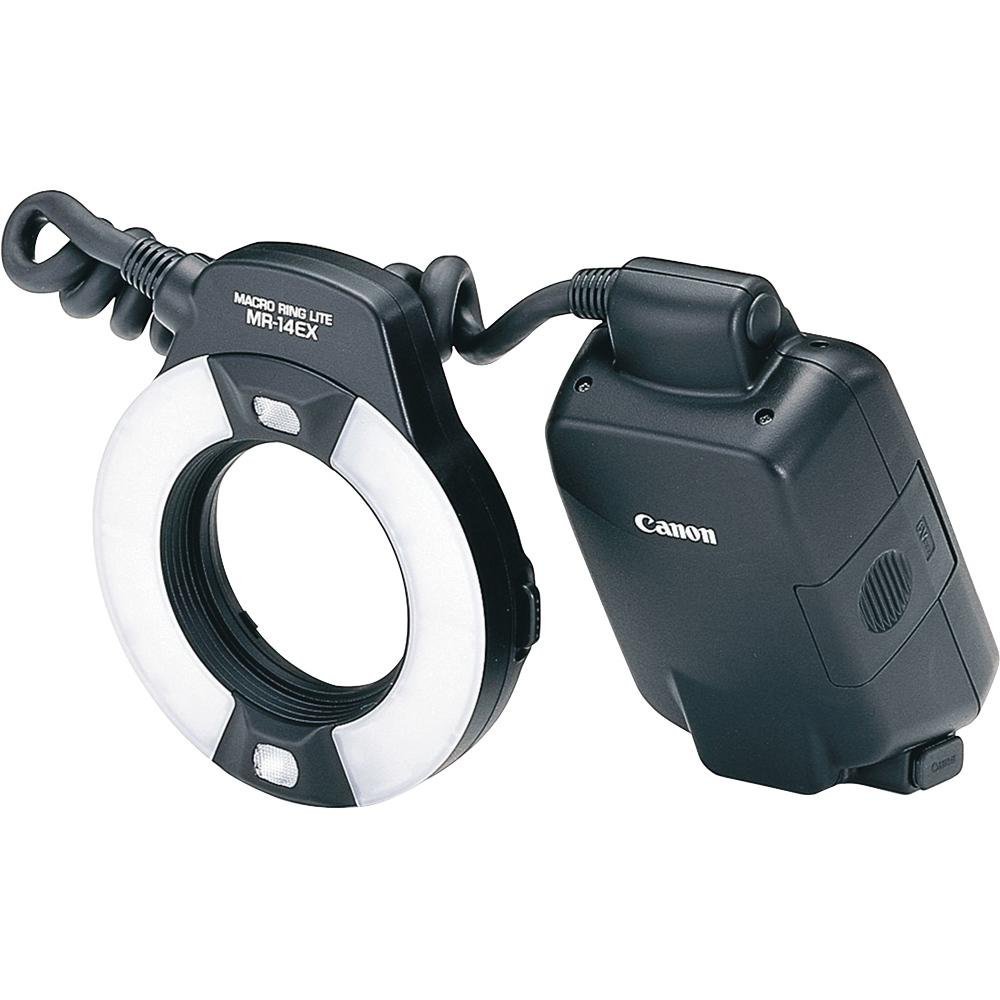
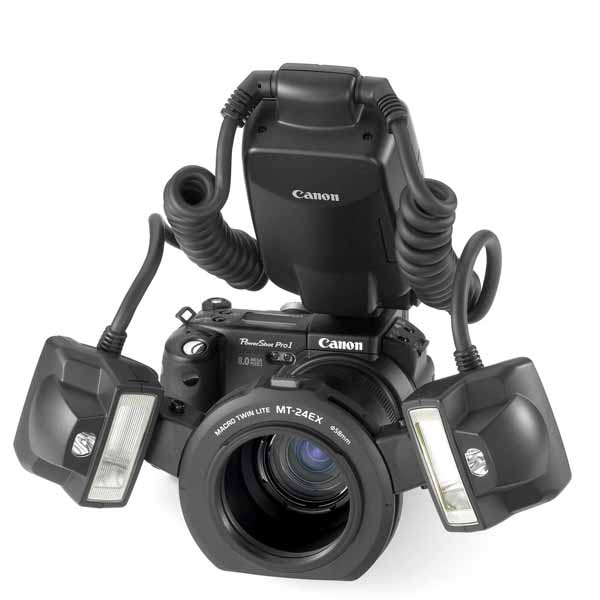
Canon MT-24 EXT Macro Twin Lite Flash
These flashes are ideal for macro photography because you can place the light next to the lens ensuring that light will reach your subject.
Normal external flashes, on the other hand, have the same inherent problems that your internal flash has: when your subject is close to your lens any light from above will be blocked by your lens. But external flashes, the right external flashes, have a trick up their sleeves.
Insect Photography With External Flashes
There are a lot of external flashes to choose from. But they all essentially do the same thing; they put more light on your subject.
When engaging in insect photography you want to avoid aiming the light directly at the insects.
This results in flat light and that takes away the texture and most interesting aspects of these little creatures.

Photo Credit: Alexander Wild
When considering an external flash look for those that have swiveling and tilting flash heads.
This is critical because it will allow you to aim the light in almost any direction you choose.
Since you don't want to hit your bugs head on with a ton of light, a swiveling and tilting flash head will let you aim the light indirectly at your subject.
This can create a cast of light that comes from the side and this will add more of a three dimensional feel to your picture.
Plus, if your lens is on top of your insect your external flash may prove pointless unless it is directed off to the side or directly up.
When you are aiming your light away from your insect you can bounce that light back onto your insect so that the light cast isn't as strong or as direct. You can bounce light with almost anything. The leaves above an insect can serve to bounce light back onto your insect, for example.
As with most insect and macro photography, trial and error is part of the game. Practice will make perfect. Don't walk away just because your first attempts didn't give you the results you wanted or expected.
External Flashes And Accessories For Insect Photography
Like I said, there are a lot of flashes. I'm only going to list a few of them here along with a few accessories that will help you manage the way the light comes out of the flash.

Canon 600EX-RT Speedlight Flash - great flash. And you'll pay for it. But this is one of the best around.
Sigma EX-610 DG ST - not as durable as the Canon 600 EX-RT but it's not as expensive either.
Neewer TT-560 Flash Speedlight - a simple external flash. It's cheaply made. So don't drop it.
Opteka SB1 Soft Box Flash Diffuser - fits over your external flash to soften the light giving your subjects more attractive lighting.

Interfit 12 Inch Collapsible Reflector - tiny enough to carry around in the woods with you this reflector can help you bounce sunlight onto your small subjects.
Rotating Flash Bracket Grip and TTL Off Camera Shoe Cord - these items help you get your external flash off the top of your camera. The bracket grip can hold your flash in a variety of positions and the TTL camera shoe cord can be used as a handheld way to point your external flash where ever you want.
If you use the cord alone, you have to hold the flash in one hand and control your camera with the other.
Lighting For Insect Photography Recap
Lighting for all photography is important.
It becomes especially challenging when you are using a macro lens and photographing insects that are right up under your lens.

Photo Credit: Alexander Wild
To achieve results that go beyond the ordinary you will need to take steps that go beyond the ordinary as well.
If you are shooting without any type of additional light source, look for insects that are well lit by the sun.
If the sun isn't working entirely in your favor, one simple solution is to place a white sheet of paper near your subject to bounce the sunlight where you need it to be. You can step it up a notch and use a reflector to do the same thing.
A portable reflector will bounce more light than a piece of paper. You can get creative and make your own reflector with aluminum foil or anything that reflects light and doesn't absorb light.

Photo Credit: Alexander Wild
To give yourself every advantage, you can bring any variety of external flashes to shine light directly on your subject. You will need as much light as possible because you have to use a narrow aperture to make sure that you have focus throughout the entire depth of field.
Avoid using your built in flash. Odds are it won't even make a difference anyway because your lens is going to be in the way.
And finally, expect to see the majority of your pictures out of focus. Insect photography is extremely challenging and as a result it is extremely gratifying when you nail that perfect shot.
Related articles
- Insect Photography Tips 101: The Down and Dirty On How To Shoot The Itty Bitty
- Insect Photography Tips: Lenses and Accessories
- Insect Photography Tips: Tripods, Monopods, Focus Rails
More from picture power


RECOMMENDED FOR YOU
7 Low Light Digital Photography Tips
The test of a good photographer is not how well they shoot in good light, but how they handle a low-light situation. Here are some basic tips on shooting low light digital photography.
Engagement Photo Ideas For Wedding Photographers And Couples
Whether you use props, matching outfits or a unique setting, get inspired with these engagement photo ideas.
Fun Photography Ideas | Tips for photographing toys and memorabilia
These fun photography ideas can turn a boring day into a day of adventure. Give your toys the attention they deserve and learn how to think like a cinematographer.


A COMPLETE PHOTOGRAPHY TEACHING KIT
Return Home from Insect Photography Tips Lighting and Accessories


Search
Picture Power