fashion photography
in the streets of san miguel de allende, mexico
By Scott Umstattd

Fashion Photography: Through a series of good fortunes that started with me volunteering to take photos at a fashion show fundraiser, I found myself taking pictures of models in the streets of San Miguel de Allende, Mexico as a regular gig.
Part of that good fortune lies in the town that I live in. San Miguel de Allende, in the state of Guanajuato, is an incredibly picturesque place. Visually, it is highlighted by La Parroquia de San Miguel Arcangel, the big church in the center of town.
Cobblestone streets, though not great for walking or for cars or bikes give the pictures from street level more texture. As do the worn and colorful old buildings.

My photography background is mostly documentary/journalistic in nature. I enjoy the sport of photography. I knew going into the first shoot that I would be able to bring back some nice pictures. But I had no idea what lay ahead.
Fashion Photography
getting started

First, here is a picture from the first shoot. This was in the back of the designer's store. Sindashi designs and hand paints dresses and other things that women wear.
After a very brief discussion, owner Angela Nasta Obregon and I agreed that using models would be better and shooting in the streets would give the pictures a lot more life.
So, a week or so later I came back not knowing what to expect (with regard to the models). For the thirty minute walk to the Sindashi studio I thought about ways to direct the models. Asking them to stand here or do that. And smile! Or don't smile. I had no idea if I was going to be working with regular people in weird dresses or attractive models that needed little direction.
I prepared for normal people but I got models. Real models who knew what they were doing and easily took direction.
This was huge. Not having to generate energy or attitude from the models allowed me to simply tell them what to do then let them bring it while I focused on light, shadows, colors, traffic, breaks in traffic, backgrounds, people, huge cracks and drops offs on the sidewalks, etc. Not to mention, aperture, shutter speed, ISO, focusing, checking and rechecking after every series of shots.
Fashion photography
Approaching the shot
I'll give a little background about how I go about getting each picture.
Since I know the models and the dresses are going to be the subject, I put all of my attention on the background. Why worry about how the models will look? (I know they will look good.) I look for the right colors in the background and of course the best light.
The best light for us is in complete shade from foreground to background. We shoot early in the morning to avoid the harsh morning light. Around 10am the sun is too high and it is no longer being diffused by morning humidity and the angle of the sun in the sky. Shadows become hard, unyielding differences between light and dark.
Introduce some of that harsh light into your picture and it becomes impossible to get an even exposure. That means that where ever that harsh white light is in the picture, that area(s) will very likely be overexposed and lacking in any detail that could prove useful in post production. So, I look for shade from foreground to background and accept blown out areas when I have to.
With regard to color, I know that colors way off in the distant will end up being blurs of colors because they will be out of focus. When shooting the models against a wall, I know that the details in the colors will be seen because the wall will be in focus (at least somewhat in focus). I look for colors in the background that compliment the colors of the dress.
Fashion Photography
BAckground creates the setting

Back to the background. It is critical. It's equally as important as the subject. (I sometimes say to myself.)
By moving around and changing the background you can introduce new elements. You can create a completely different picture.
I would love to have a ladder on these shoots. Not just for the sake of a different angle but to remove the sky from the pictures. Often, when exposing for the models the sky becomes overexposed. Shooting from a higher position would allow the camera to angle down. And the sky is not down.
I can easily move from side to side or down but getting higher is a bit more of a challenge. And so is taking pictures with a ladder strapped to my back. An assistant would be great.
Fashion Photography
Aperture

Above: This is a good example of little depth of field. The door and frame are just a few inches away from Jana. I shot this with a Canon 6D and a Tamron SP 70-200mm f/2.8. At 150-200mm (more so at 200mm) objects in the background are more easily blurred. Shooting at f/2.8 makes the background look dreamy and drives even more focus on the subject.
The 70-200mm range is great for this type of street photography. The models are never out of shouting range to give you an idea of how we far apart we can work. I would like to add a Canon 2X extender. This would give me a lot of zoom to compress (blur) the background. But I digress.
I typically will shoot around f/4 for these shoots. Yes, if I shot at f/2.8 I would get more background blur and better bokeh (when the model is not up against a wall) but they are always moving. We need the dresses to flow so they spin or walk or turn and twist to make that happen.
f/2.8 is simply not enough depth of field for me to get tack sharp pictures. By closing down my aperture (using a higher f/stop number) I create a thicker depth of field.
Check out the picture below, especially the door and frame and compare it to the picture above.
Fashion Photography
depth of field

Above: Mittie is much farther away from the door and frame than Jana was. This was shot at f/3.2 which will create more background blur than f/4.0. But the bigger factor that gives this background more blur is the distance Mittie is from the door.
If I wanted to have both Mittie and the door sharp, I would simply close my aperture to something like f/18 (just guessing but it will be a high number). But doing that will make the picture darker. So, I would need to increase the ISO (adding grain and noise) or use a slower shutter speed (creating blurry/out of focus pictures).
I really should have shot this at f/4 or f/5.6. I got lucky using a depth of field as little as f/3.2. Since she was a good way away from the wall the background would have still been soft.
For this we did a series of back and forths where Mittie walked to the wall and back to me. Focusing as she approached me was challenging because she kept getting closer and I would actually get the shot off milliseconds after focus was reached only to find that her eyes were blurry or soft (not tack sharp). Shooting at f/5.6 would have given me a little more breathing room during that split second between focusing and firing off the shot.
Luckily, I had come across several articles that encouraged using my right thumb to hold focus (using one of the buttons behind the shutter). This was said to be very helpful is tracking focus on subjects moving at the camera. It's a little tricky to get use to moving the fingers and thinking a little different, but I like the sport of photography and doing this does seem to help.
Fashion Photography
editing

Above: This is another one that was created by Mittie walking back and forth toward me and away from me. It's easy for me to forget that the dresses are the subjects in these pictures. So, it's important to get pictures of them from all angles. These aren't portrait sessions.
My editing process is pretty simple. No Photoshop. But I will remove ugly or distracting things from the pictures. Like some trash I removed from this one.
Though we may be doing street photography, I am not documenting the event. So I take liberty to change (remove) things. I don't add objects but I will add light or take away light and change color or take away color using Adobe Lightroom and the NIK Collection.
I shoot in raw format. Before I got Lightroom I wasn't able to edit raw files. I used (and still use) Picasa. It's a great free photo organizer/editor and it can edit raw files but not well. Not professionally.
Since moving from JPEG to raw and editing in Lightroom my pictures look better.
Fashion Photography
composition and positioning

Above: This is one of my favorites. Simple and clean. The colors work well together. My focus is dead on (eyes and hair). Subject and background are in the shade (giving even light throughout the picture). And Ella Mae nails the pose and look.
This kind of fashion photography really is like a sport. Sometimes you get a hanging curve that looks as big as a grapefruit and you see the home run before you even swing. It's like that with street photography. You are playing against the street but there is also a game you are playing in your head in order to play against the street.
Diagonals work well in fashion photography. You want the pictures to convey energy and movement to capture the viewers attention. Angles help to achieve the feel of movement. Ella Mae 's elbow sticking out anchors her body and the picture. Imagine the shot without her elbow there and your eyes will move up and down the picture differently.
Fashion Photography
Every street is different

Above: Having good models really helps. In this shot I asked Sabine to "look over there" and she made this dramatic gesture. This is, in part, why I like shooting fashion this way. It leaves a lot of room for improvisation. Which keeps me on my toes.
San Miguel is blessed with hundreds (maybe thousands) of great doors. This is a door going into a church. People are pretty laid back in San Miguel because people were coming in and out of that church door as we took our pictures and no one seemed to care or notice what we were doing.
Fashion Photography
Shutter Speed and Cropping

Above: Another great look from Ella Mae and a colorful background to bring out the blue in her dress.
The red/orange in this picture makes it for me. It adds fire to an otherwise calm setting.
I typically use a fast shutter speed. I like 1/400th of a second or higher. I'm aiming for tack sharp pictures. That's one of my final tallies at the end of the day. What is my TSP percentage and what is my TSP total?
Another challenging point I've noticed is where and when to crop out legs, arms, hand and feet. Sometimes it feels ok to let their hands be cut out and other times it may seem weird to leave them in. I'm not sure if there are "guidelines" about this. I'm sure there has to be some kind of best practices or something. For now, I'm just going with what feels right.
These shoots have given me an opportunity to combine a lot of what I like about photography. Shooting in the streets like this requires quick thinking. Quicker thinking demands control over your movements.
Think fast. Be fast.
Be fast. Think faster.
It's a game. It really is the sport of photography. The sport of fashion photography.
Fashion Photography
fashion photography Gear
I shoot with a Canon system. Always have. I have used some other cameras. Though, not many. For these shoots I used one of two combinations. A Canon 6D with a Tamron SP 70-200mm f/2.8. Or a Canon 60D with a Canon 200mm f/2.8L USM II.
I recently purchased the Canon 6D and Tamron lens. And I have had the Canon 60D and Canon 200mm for a number of years.
Here are some of my thoughts about the gear I use.
Canon 6D - I haven't had it long enough to write a review, but here are some of my first impressions about this camera. (UPDATE: I have had the 6D for over a year now. Here is my full review of the Canon 6D.
Canon 60D - I've had this camera for about four years and love it. Here's my review of the Canon 60D.
Canon 200mm f/2.8L USM II - this takes beautiful pictures. It's limited because it is a prime lens, but it takes stunning pictures. Here's my thoughts about the Canon 200mm f/2.8L.
Tamron SP 70-200mm f/2.8 DI VC - I haven't written anything specifically about this lens yet. So far, I'm pretty pleased with it. I've had some focus issues but nothing that has given me too much concern. This lens was necessary because the fixed focal length on my Canon 200mm was proving too difficult to work around on the streets. Being able to zoom back (even just a little) has helped me save a lot of pictures. UPDATE: I have reviewed the Tamron SP 70-200mm f/2.8 DI VC.
Let me know if you have any questions about these shoots. Better still, if you've got some thoughts on what I could be doing to improve them let me know.
More from picture power


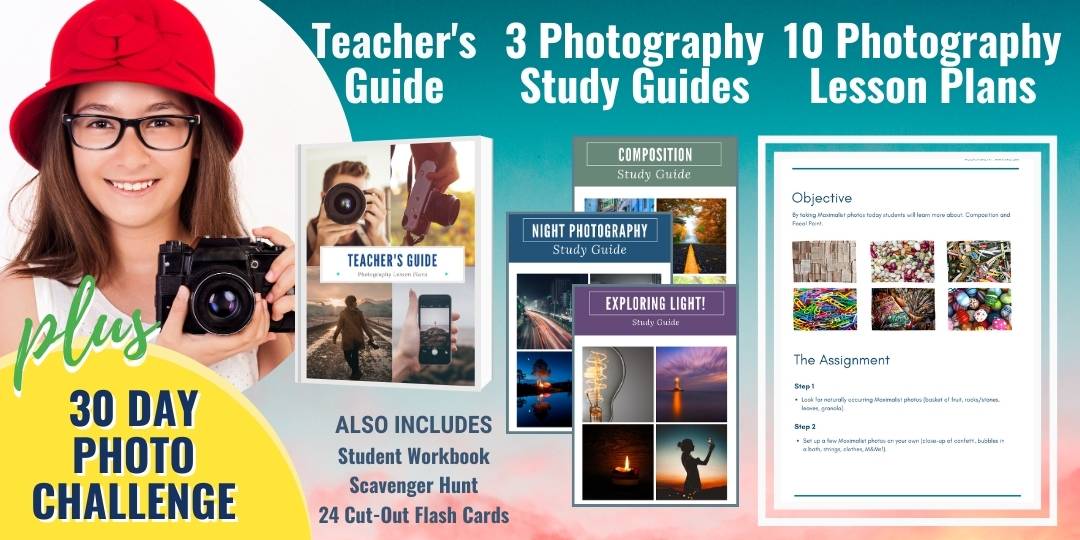
A COMPLETE PHOTOGRAPHY TEACHING KIT

Search
Picture Power
